20130506-144627.jpg

Ingredients: coat hanger, washi tape, plastic bag ribbon, shells, tin foil cups, plastic / metal lids, beads, bells

The Big Sell: I wonder if we can decorate this old tree with something beautiful?

Strategy: As I’m currently preparing for an Eco Arts Day at our local museum, I’ve been experimenting with recycled materials. On this gorgeous sunny Bank Holiday, we decided to tackle chopping down a big dead old shrub in our back garden and the remaining twisted sculptural trunk seemed to be calling out for an outdoor arts exhibition.
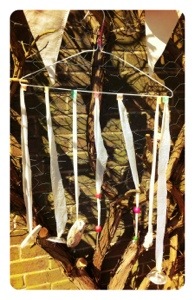
Taking a wire coat hanger, I created plastic bag ribbon (which I’ve been loving to make of late to try out plastic bag weaving, more of which to follow) and tied strips on, securing the ends with washi tape. I then added various pendular objects – shells, craft bells and tin foil cups, plastic lids decorated with more washi tape.

Verdict: My pretty mobile now tinkles and flutters in the breeze. I’m not convinced its English-weather proof but it’ll live on a curtain rail inside when the weather is not fine. All round, a thoroughly satisfying result from recycled materials, and our dead old shrub now looks a lot happier!

Catchphrase: Peaceful birdsong and the gentle rustling of plastic ribbons…

Left wanting more?

Try plastic bag weaving, you simply make a loom from card, wrapping your base ribbon around one way before threading stripes of colour in and out through the opposite axis. If you want to see how I did it, keep posted for an upcoming blog. Great for making an outdoor garden kneeler or coasters.

Look back at my blog on Homemade Forest Schools for more ideas for outdoors play with your children.

20130413-124421.jpg

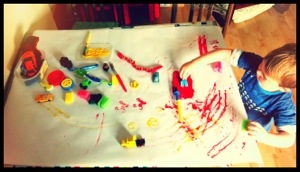
Ingredients: large roll of white / brown / newspaper, washable paint, paintbrushes or rollers, plastic trays or lids, lots of printable toys – cars, toy snake, stamps, old cabbage / broccoli / potatoes, sponges or polystyrene (which can be cut into interesting shapes), bubble wrap, feathers, shells, leaves, old toothbrushes, and anything else you fancy

The Big Sell: Roll up, roll up, and visit the printmaking station!

Strategy: Really straight forward this one, just teach them how to roll or paint onto their ‘stamp’ of choice and they’re away printing to their hearts content.
The interesting aspect of this activity is how popular it can be with children who are reluctant to engage in arts activities. My youngest generally resists arty crafty stuff, but I set this up for him today and he loved it! Even though he got a bit upset about ‘getting my hands sticky’ at one point, I simply left out the wipes in a calm relaxed way, and explained he could clean his hands if he wished but that the paint wouldn’t hurt him.

Verdict:
I used this activity at a Family Arts day I was running yesterday at a local museum, and it proved popular with all ages. Therapeutic and quite scientifically mesmerising, it really draws together the skills involved in exploring texture, pressure, movement and pattern. The final image often looks wonderfully chaotically abstract and can capture children’s imaginations, whilst all the toys can go straight in a soapy washing up bowl.

Catchphrase: ‘Neeeeeooooooow! Screeeeeech! (The sounds of the cars driving through the paint)

Left wanting more?

When your paper is dry draw back into the images, like looking at cloud shapes – what can you see?

Alternatively cut into tiles and create your own jigsaw trying to piece it back together.

Leave out sponge alphabet letters (I got a pack in Tesco’s cheap the other day) to encourage literacy play.

20130224-161327.jpg

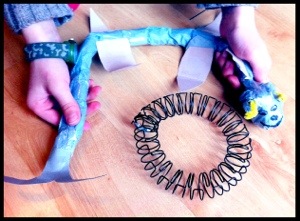
Ingredients: metal spiral binding from a used notebook; tissue; Sellotape; pipecleaner; card

The Big Sell: Have you heard about the legend of the Loch Ness Monster?

Strategy: I recently bought a new book called Nessie by Richard Brassey and my seven year old was completely enchanted. A few days later, during a clear out, I asked him if a salvaged spiral binding from a notebook was of any use? ‘Yes!’ he yelped and set off making this Plesiosaur all by himself.

Simply wrap tissue around the spiral spine, attach with tape, add a newspaper ball head and card flippers, then finally push a pipecleaner through for ears.

Verdict: I love it when my son finds a new use for something about to hit the bin. Since I started my business running arts workshops, our household waste has reduced by half!! So I guess the moral is, always have a junk box for feeding children’s brains…

Try out some folklore on the children you know too – it’s a really interesting avenue into history to explore local and national legends. Try making your own fairies at the bottom of the garden by painting onto photographs or turning dolls into mermen by sewing a velcro fishy tail. Our Nessie moves wonderfully with his spiral spine, and would make an equally satisfying snake or caterpillar. I’ve a feeling a trip to the Scottish Highlands is calling us…!

Catchphrase: Och Aye! It’s a wee Nessie!

Left wanting more?

Another excellent recycling opportunity was an old yellowing A -Z found in the car boot, now transformed into map paper for endless treasure hunts…

20130103-154403.jpg

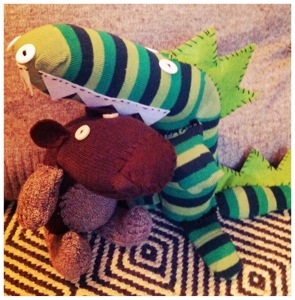
Ingredients: old socks, scraps of felt, needle and thread / darning wool, buttons, stuffing

The Big Sell: Wow, you’re feet have grown again. Who do you fancy your old socks turning into?

Strategy:
A popular one here… Good old sock toys, but especially pertinent at this time of year when children may want a new cuddly to ease them back into starting school again, and you happen to be sorting through their clothes drawers. I admit the striped crocodile one was a Christmas gift that came in kit form but with such excellent instructions I made another (for the jealous sibling) from two old socks anyway.

1) take the first sock and stuff (use an old cushion if you don’t have any wadding) then sew up the bottom – this will be the head and body.
2) the heel of the sock will form the top of the head, put a stitch underneath the neck to make a right angle.
3) take the second sock and cut out 4 squares from the top part of the sock
4) sew them (wrong sides together) most part round, turn right way out, stuff and then hand stitch the last side. These are the hands and feet, sew to body.
5) make a tail from the last remaining section of the 2nd sock if required.
6) add remaining head / tail spikes /teeth (croc) or nose / ears /tail (bear) from felt scraps
7) sew on buttons for eyes.

Verdict:
Really easy peasy handmade toys which I must admit are extremely appealing looking. Recycling at its best!

Catchphrase: ‘just don’t name me cheesy!’

Left wanting more?

Top tip: mix and match two alternate colour old socks to give accent colours to your sock pet.

Add these characters to your cardboard puppet theatre for added play value! (See last post)

20121231-215515.jpg

Ingredients: leftover box, recycled wrapping paper & fabric off-cuts, drawing pins, variety of colours of paint including gold, puppets or small toys

The Big Sell: ‘you’re bored already?!? You only just got your new presents! Well, ok, let’s make something …’

Strategy: Not long after ‘The Big Day’, something infuriating happens (well it does in my household at least) and I realise for the zillionth time (I never learn) that we didn’t need to buy them so much stuff, what they really wanted this Christmas was our time.

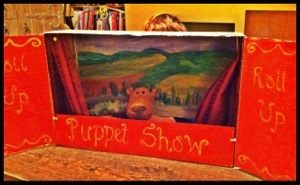
In our house this year, quarantined by illness, this is something of which we’ve had plenty. As we’ve slowly recovered and creative juices started to flow again, we worked on our own homemade Puppet theatre, as follows:

1) take a large rectangular box and cut off one of the longer flaps, this cut edge will form the top of the theatre facing you.
2) turn the box around to the back and, ensuring this side is still taped together cut a long hole (about 10cm high) along the full width of bottom section of the box (this will form the hidden hole where your children can hold the puppets up)
3) turn the theatre to the front again and take your time painting a landscape of your choice on the background
4) now paint the remaining three flaps red, decorate with gilded patterns and words ‘Puppet Show’. Make sure the long bottom flap is raised (held up by more drawing pins) to obscure the hole at the bottom of the background from the audience. The side flaps can extend to either side to form wings.
5) add curtains from fabric off cuts and attach with drawing pins.
6) once dry, position on a low table which your child can sit behind, add puppets and invite your child to play!

Verdict:
This worked amazingly well and the box was large enough for both children to be able to fit their hands in. The adults sat back and enjoyed some wonderful improvised plays.
Whilst its infuriating that the box is often more successful than the toy, you may as well make the most of it and nurture your child’s creative potential.

Catchphrase: ‘He’s behind you … Oh, yes he is!!’

Left wanting more?

If your child needs help devising their script, try telling a stepping stone story first with them (take it in turns to tell short segments of a story) to draw together some dramatic ideas.

Play a turn-taking game of ‘guess something odd about my puppet’ (they have a funny accent / like to walk the tightrope / have an evil laugh) to help them develop character traits.

If you want add more backdrops to your set, cut a long slot in the top of the box and drop in sheets of painted paper sellotaped to lolly sticks to hold them at the top.

Thank you to all my visitors in 2012.

The WordPress.com stats helper monkeys prepared a 2012 annual report for this blog.

Here’s an excerpt:

600 people reached the top of Mt. Everest in 2012. This blog got about 3,700 views in 2012. If every person who reached the top of Mt. Everest viewed this blog, it would have taken 6 years to get that many views.

Click here to see the complete report.

20121224-182915.jpg

Ingredients: card, recycled wrapping paper, stickers, pens, ribbon, glue

The Big Sell: You’re bored waiting for Christmas to come? Lets make a present for your favourite toy.

Strategy: When your kids are counting down the days / minutes / seconds to Christmas with increasing feverishness, try providing them with some easy crafts to keep enthusiasm levels high and boredom levels low. I’ve taken to leaving out a bowl full of Christmas related paraphernalia – silver gel pens, ribbon off cuts, glitter shakers, red and green card, stickers – to tempt them.

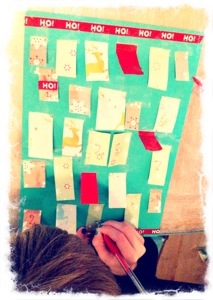
Here is an easy calendar which they can make for themselves, a friend, sibling or teddy, encouraging numeracy, imagination and inspired by the spirit of giving.

Stick flaps made of recycled wrapping paper to some coloured card and invite your child to write all the days from 1 – 25, decorating behind each flap with a surprise sticker or picture. Hang ribbon at the top, wrap up and leave under the tree ready for the big day.

Verdict: In our house we are sulking, as the notorious Norovirus bug has taken us hostage just in time for the big day. But despite being very poorly, nothing holds my eldest son back from creating, and this activity occupied him for a good while, easing his symptoms.

Catchphrase: ‘We didn’t leave you out Horace (his teddy)!’

Left wanting more?

Set your child a (boredom-relieving) Christmas challenge, like making a pop up Christmas card, or a poster collage in the shape of a snowman or gingerbread man made from recycled paper.

Get yourself ahead for next year by saving all the cards and wrapping paper and folding it away in a box. This will pay dividends when it comes to new crafting ideas.

If you can recycle an old patterned jumper, why not run up a simple stocking for your child to make into their teddies? They will spend many happy hours looking through their toys to find small gifts to fill it.

20121125-190509.jpg

Ingredients: string, PVA glue, strong card, scissors, paints and brushes, brown paper / newspaper, tissue paper

The Big Sell: Did you know Santa’s elves have to design & print their own wrapping paper? Lets give them a hand!

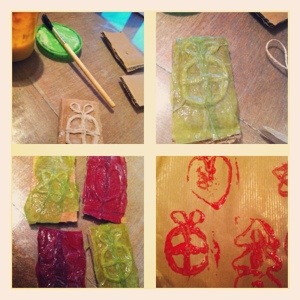
Strategy: Simple printmaking idea which is perfect as a Christmas activity. Simply glue string in the pattern of your choice (heart, gift, tree, star, etc..) onto squares of hard cardboard with PVA glue to make your stamp.Then cover in a layer of tissue paper and leave a while.
Once dry, ink up with sticky paint and print merrily away (with Jingle Bells accompaniment if you wish!) on reams of brown paper or news print. Hang up to dry on washing line.

Verdict: A very pleasing, economic and therapeutic way to create beautiful personalised wrapping paper or cards. Kids tend to like stamps as much as stickers, which helps, and relatives will love the personal touch. You could even make individual letter stamps to label everyone’s presents with their own initials.

Catchphrase: ‘let’s gets a factory line going like inside Santa’s workshop!’

Left wanting more?
You could always make a secret Santa stamp to decorate those extra special gifts that arrive down the chimney (just make sure you hide the stamp away!)

Ingredients:  A roll of wallpaper; pens / paints / crayons etc…

The Big Sell: Let’s make a Secret Hideout door!

Strategy:  It’s been growing on me for a while how useful it is to have a roll of wallpaper in your art tool kit. I often see them in charity shops for pennies, because they have old patterns that no one wants, and they are such incredible good value for money. A cheap roll of thick high quality paper is priceless and very versatile. Here are some of the many uses:

1)      For Halloween we drew around my son’s body outline, coloured him in as Dracula in a coffin and pinned it to his bedroom door.

2)     In group work with children or young people, create a Wallpaper Walk evaluation by noting down the reflections of student each week as they undertake a project, then rolling it out to re-step the journey for group discussion at the end.

3)     For younger children, draw out a road or railway and let it roll down a hallway or garden path for them to play on with toy cars.

4)     Or roll it out with markings / puzzles leading to hidden treasure (they must work out clues along the way).

5)     Use it for large scale print-making – use foam stamps, potato stamps, broccoli stamps (!) anything that takes your fancy.

6)     Bring it out for birthday parties for a group doodling session. Can they work as a team to draw the most colourful multi-layered birthday cake ever?

7)     Easy peasy set design – pin it to a wall and devise the background set of a play written by your children to perform for everyone.

8)     Or my son’s choice this week (as he had watched the hilarious Young Frankenstein for the first time and was hankering after a secret bookcase revolving doorway) was to draw the image of a boarded-up room with ‘Caution’ and ‘Keep out’ signs and then pin it to their play room door so that only those who know the password are allowed entry!

The verdict:

Arts materials with BIG impact are always popular. A long roll of wallpaper carries an inherent property of unknown possibility which is a firelighter for the imagination.

Catchphrase: Rolling, rolling, rolling… keep those ideas rolling!

Left wanting more?

  • If your children love The Wizard of Oz, why not make your wallpaper roll into the yellow brick road to add value to their play?
  • Glue string lines down the length of the wallpaper to make tracks and create a marble race game.
  • Create a landscape to feature your child’s latest lego creations.

A quick update blog – a few weeks back I blogged about Autumn arts play and the importance of bringing the outdoors into our creative play with children. I mentioned how the National Trust in the UK are working hard to address the problem of growing Nature Deficit Disorder in our children. Well, now a film is being made about this very issue and they need donations to make it happen. Watch this video and if it’s something you feel passionate about like me, make sure you pledge your support to make it happen!